Our founder, Wendy Iles, is renowned for her "organic textured beach waves" as she calls them, seen here on her client Heidi Klum. The word "Organic" is used because the waves should look effortless and feel luscious to the touch. The secret is all about product. We are about to tell you which in A Step-By-Step Guide To Heidi Klum Beach Waves.
Beach waves are always on-trend, and it doesn't seem like they will go out of style any time soon. And why would they? When you can create multiple variations of beach waves just by adjusting the size and type of iron you use, this leaves room for many different options for your hair curl patterns. The secret is to make the waves as real as possible. Notice a natural wave will often have a tendency to have looser ends, or in the case of children, curlier ends, not straight ones, as we so often see from force-created beach waves on social media, so be very sure you ease these movements 'like creating poetry' as Wendy always says.

What You Will Need
To create the perfect beach waves, it is essential that you use the right tools and products. Proper product usage and tool selection will set you up for success when recreating this look. This being said, let's talk about some of the items that will come in handy:
Products: There are many products out there and we know it can get confusing when trying to decide which is right for your hair type and the style you want to create. If you have already a natural wave, the product for you is Iles Formula Curl Revive.
If the hair is straight then and you need to create from scratch the waves, therefore we recommend our Iles Formula Finishing Serum.
These are definitely your go-to products because both serums are appropriate for all hair types and transform any hair type no matter how damaged to feel like luscious silk! What's more, both serums are heat protection + UV protection + prevents color fade and protects against humidity....that's frizz!
The Iles Formula Serums are very popular amongst our formulas, so much so, we have just bottled them up into a 500 ml size alongside our 200 ml. The 200 ml vessels can also be easily topped up from the 500 ml pumps so you are never without your preferred serum. Click links to see. Finishing Serum + Curl Revive

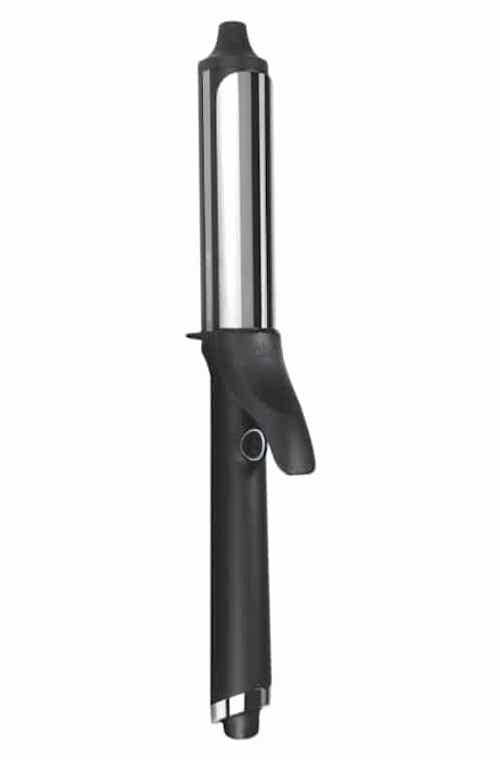
Tools: There are different tools you can use to create beach waves. 1" flat Irons and various size Curling Irons are usually chosen for creating these styles. Selecting which iron size to use for hair length, and the size and volume you want to achieve will be the deciding factor in which size iron to use. Typically 1 and 1/4 or 1 and 1/2 inches are the desired iron sizes if creating waves, larger wands if easing naturally curly hair into looser beach waves. We suggest this clamp iron GHD iron as it works well for this technique but really, any brand of iron will be suitable as long as there is a heat control option on your iron, and its ionic to prevent static electricity.
Comb+ Turban Towel Finally you will need a comb. Not just any comb though. You will want to use a comb with very wide and spread teeth. Our Iles Formula Conditioning Distribution Comb is a perfect size read-on to know when to use it, also the Iles Turban Towel, read on to find out why.


Step By Step Guide
Now that you have gathered all you'll need for A Step By Step Guide To Heidi Klum Beach Waves let's determine if you have some natural wave or not.
1./ Shampoo and condition with Iles Formula shampoo and conditioner. On applying the conditioner, comb it through with the Iles Formula Conditioning Distribution comb finding roughly where you wish your parting to be. This will be the last time you will comb your hair through. Rinse the hair, and then extract much of the water without disturbing the curl formation, by using the Iles Formula Turban Towel. Once the towel is quite wet around 2 to 5 minutes, remove it and shake natural movement into place. Try not to disturb the curl movement the turban towel has helped form. Do not brush or comb, from here on it, it's about using your fingers. This towel is excellent for squeezing out water without disturbing the curl formation, in turn preventing unwanted frizz.
Naturally wavy hair
1/Apply Iles Formula Curl Revive to naturally wavy hair and diffuse. The whole process here will be to loosen out sections of the curl once dried.
2/Once dried take a large and medium barrel curling iron to define haphazardly sections of the hair to make them less curly. A 1-inch straightening iron can also be used with semi-circular wave movements, but this is quite tricky to master and is another journal subject. If you know this technique it's a good one to use.
Take haphazard sections and half wind the hair around the tongs here and there down the section. Some sections wind in a forward direction and some sections in a backward direction toward the center back of the head. Around the face line, it's advised to start moving hair away from the face, to create better and open up the face.
3/ Last but not least add more Curl Revive if you feel the necessity to control any fluffy frizz.
Straight hair (the technique used for Heidi's hair)
1/Apply Iles Formula Finishing Serum all over, except root area. For a boost of root volume, flip your head upside down while drying to create an added lift. Dry hair haphazardly kneading hair up into hands to try and create some kind of movement. This can be somewhat of a rough dry, as you want to encourage some of your natural texture to be combined with the texture you create. Once dried the process will be to encourage more precise curl movement with hot tongs.
2./ Beginning from the bottom, take 1-inch sections. Place the iron 3 inches from the root area, and twist half to fully around 1 time. We like to make this movement away from the face. Allow it to sit for 3 seconds then, move the iron down in a sliding movement to about 2 to 3 inches and repeat.
In other words, there is a gap of no-curl between the curl movements you make. Repeat the process again, until you reach the ends, leaving out at least an inch of the ends of your hair. Note that the ends should not be curly, but not straight either, so fine-tune them by sliding the tong through them, but not curling them. Nothing is more unappealing in our minds than wavy mid-lengths and forced straight ends, a natural wave will never look like this.
Allow all of the twists to cool in place.
2/ Finalize both methods above using your fingers to detail the waves. If you find it's a little too curly, just blast the hair all over for about 30 seconds with a burst of hot air from your dryer. It works every time.
3./ Apply our Finishing Serum to add separation to the waves and, if you normally use a hair texturizing spray, we suggest skipping that step and just using more of our Finishing Serum by piecing it on the strands and allowing it to dry in naturally as Wendy did on Heidi's beach waves above. This will deliver the most sumptuous touchable hair texture, and help the style to last all day while protecting hair from the elements.
Are you a beach waves expert? We want to see your work! Tag us into your posts using @ilesformula_hair and #IlesFormula so we can see your perfect Beach Waves.
0 comments